Using 3DS Max: Difference between revisions
(First set of wiki updates with images!) |
(Further updates and images for 3dsmax guide and workflow) |
||
| Line 44: | Line 44: | ||
The original master files from the scrapyarder dump are not well organized. This is what you will see within layers window the SM_Master for example. (The SM in the file name stands for "standard male") | The original master files from the scrapyarder dump are not well organized. This is what you will see within layers window the SM_Master for example. (The SM in the file name stands for "standard male") | ||
[[File:SM Master-standardLayers.jpg|center]] | [[File:SM Master-standardLayers.jpg|center]] | ||
The bones are all located with in the "0 (default)" layer in this file. Twirl open the plus sign next to the layer. As this holds the majority of the file geometries, your computer may pause for a moment when you do this action. | |||
Viewed alphabetically, here are just a few bones of the standard male skeleton circled in red. | |||
[[File:SM Master-aFewBones.jpg|center]] | |||
In the Parameter listing just below, find “Bones” and press “Add.” Search for the specific bone(s) you want to use by typing in the name in the search menu, or by looking through the child dropdowns by clicking the + button. | In the Parameter listing just below, find “Bones” and press “Add.” Search for the specific bone(s) you want to use by typing in the name in the search menu, or by looking through the child dropdowns by clicking the + button. | ||
[[File:SkinAddBonesButton-Max2011.jpg|center]] | |||
If your model is static, and is not influenced by any other bones or body parts, then you’re done. Otherwise, select all the applicable bones. | If your model is static, and is not influenced by any other bones or body parts, then you’re done. Otherwise, select all the applicable bones. | ||
If your model uses multiple bones you may need to change the weights influenced by the bones. | If your model uses multiple bones you may need to change the weights influenced by the bones. There are multiple ways to go about this, including working with default weightings from multiple bones, weight painting, or modifying and proofing your weights numerically. | ||
[[File:SelectBonesWindow-Max2011.jpg|center]] | |||
Note you can hold shift to select a range bones, hold ctrl and click to add individual bones listed to your selection, and alt to deselect. If you later realize you need to add a different bone, you can always click the add button and select from the list again. | |||
In the Parameters box, scroll down until you see “Paint Weights” and the “...” From there you can start painting weights. I’m not going to explain how to weight paint. Good luck. | In the Parameters box, scroll down until you see “Paint Weights” and the “...” From there you can start painting weights. I’m not going to explain how to weight paint. Good luck. | ||
Latest revision as of 20:14, 9 October 2020
Using 3DS Max
Unfortunately for now you’ll have to use 3dsmax 2011 in order to export models properly for the game. This segment will tell you how to navigate through the god awful UI and controls.
NOTE: guide unfinished, needs images!
Master Files
The ScrapYarder master files have the skeleton for the player. The files come in Male, Female, and Huge. You can choose to use any of them for your costume files. Each master file is loaded with hundreds of costumes that are in the game left over by the developers so you may want to get the “Cleaned” file.
Cleaned Files
These are my personal files that I’ve set up. They’ve been removed from all models except the bones and the base body for reference.
General Controls
When you load up one of the Master Files, you’ll see the main body model in a T-Pose.
- Press “P” to switch the camera mode from Orthographic to Perspective.
- Pan Camera: Middle Mouse Button (MMB)
- Rotate Camera: Alt+MMB
- Zoom: Scroll wheel
- Zoom to Object: “Z”
- Move Object: “W”
- Rotate Object : “E”
- Scale Object: “R”
UI Setup
When you load up Max you’ll want to open up the Scene Explorer. This will help you keep track of the items that you have in the program. At the top of the UI, click on “Tools > New Scene Explorer” You can see all the objects in the scene and select the one you want.
Timeline
At the bottom of the screen is a timeline. You can left-click and hold to drag it left and right. This will make the body go through a series of animations for your benefit to see if your models move and deform correctly.
Importing Your Model
Click the logo at the top right and select Import and select your file. When you import an object it will be selected automatically and show up in the Scene Explorer
Model Setup
Some costumes, like Head Detail costumes, require a very simple set up. You can leave the imported models where they are. Be sure they are selected. If the model uses multiple parts of the body or can be deformed by certain head scales, then you should move your model to where it needs to be on the T-posed model.
-
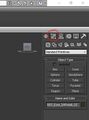
Open modifier menu.
-
Modifier List


Press the button circled in the picture above to bring up the modifier menu.
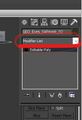
In the Modifier List, bring down the menu and select “Skin.” This will add the Skin modifier below it.
Be sure that all the bones are not hidden in your scene. You can do this by holding right click on an open area, and selecting “Unhide All” or “Unhide By Name” and then selecting the bones you want to use. Note that the master files are large documents with many geometries. "Unhiding All" may reveal too many geometries and slow down your computer. As an alternative, you can use the layers button to browse and reveal bones by name.

The original master files from the scrapyarder dump are not well organized. This is what you will see within layers window the SM_Master for example. (The SM in the file name stands for "standard male")

The bones are all located with in the "0 (default)" layer in this file. Twirl open the plus sign next to the layer. As this holds the majority of the file geometries, your computer may pause for a moment when you do this action.
Viewed alphabetically, here are just a few bones of the standard male skeleton circled in red.

In the Parameter listing just below, find “Bones” and press “Add.” Search for the specific bone(s) you want to use by typing in the name in the search menu, or by looking through the child dropdowns by clicking the + button.

If your model is static, and is not influenced by any other bones or body parts, then you’re done. Otherwise, select all the applicable bones.
If your model uses multiple bones you may need to change the weights influenced by the bones. There are multiple ways to go about this, including working with default weightings from multiple bones, weight painting, or modifying and proofing your weights numerically.

Note you can hold shift to select a range bones, hold ctrl and click to add individual bones listed to your selection, and alt to deselect. If you later realize you need to add a different bone, you can always click the add button and select from the list again.
In the Parameters box, scroll down until you see “Paint Weights” and the “...” From there you can start painting weights. I’m not going to explain how to weight paint. Good luck.
Next you must assign a texture to your models, otherwise your costumes will appear pure white when you load the game, regardless of if you assign it a texture or not in the .ctm entries.
To do this, look for the icon on the top shelf that looks like a checkered sphere with a document on it.
When you click that, a new window will open called the Slate Material Editor. If you’re familiar with node based textures this will be easy for you.
On the left side bar, look for the “Standard” shader. Click and drag it onto the open space. This will make a material. You can double click the material to rename it. The only nodes you’ll need to worry about are “Diffuse Color” and “Bump.” Click and drag the empty circle in “Diffuse Color” or drag and drop your .tga _B texture onto an empty space. Make sure to link the nodes together if they’re not linked.
Do the same for Bump, but you’ll need to drag from “Bump” out and select “Normal Map.” Then connect your _NM file node to the “Normal” node. When you are finished, make sure your costumes are selected, and click the button at the top right that looks like a sphere pointing to a cube. This will assign your material to the model(s). You cannot view what your textures look like on the model because the alpha of our diffuse is black, which makes it Transparent in Max. You will be able to see it in game though, so don’t worry.